Stamping in the Rain

Showing posts with label Thinlits. Show all posts

Tuesday, January 5, 2016

New Catalog...Saleabration!...and Valentines Day!

It's finally here!  The gorgeous new Spring Catalog is out and Sale-a-bration has started!  For every $50 you order, you get a free product from the Sale-a-Bration brochure.  So excited!  This catalog is absolutely fabulous.

I was in a swap (already!) and this is one of the cards I made using the new Bloomin' Heart Thinlits Die...isn't it gorgeous?  You do need a couple of fun extra products to really make this die work well.  One is the Precision Base Plate, which makes these intricate dies cut really well (even so, you should run it back and forth a few times).  The other is the brand new Big Shot Die Brush.  This tool is amazing!  Don't be afraid to rough it up a little as you run it back and forth over your die.  It will get all of the little paper chads out.  So easy!

I used the beautiful Whisper White Organza Ribbon and the scrumptious Birthday Bouquet Designer Series Paper with some pretty Rose Red paper.

I hope you're enjoying this beautiful winter weather.  We had a snowfall the other day!  It was fun because it is unusual for us and everything was cancelled, so we just got to go out and enjoy a free day!

Wednesday, December 23, 2015

Peaceful Wreath

This pretty wreath is hand colored with Cherry Cobbler and Old Olive Stampin' Markers and cut out with the Wonderful Wreath Framelits.  The background uses the Hardwood stamp on top of the Woodgrain Embossing Folder, one of my favorites!  I could see this card being used for a masculine Birthday or Father's Day card, if you just switched out the sentiment (which is from the Christmas Greetings Thinlits Dies)

I love this simple card!  I think if you attached the tag with a removable glue dot, it could be a Bookmark!  The pretty Holly leaves are stamped in Garden Green ink, while the berries are hand colored with a Real Red Stampin' Marker.  The background is embossed with the pretty Boughs & Berries Textured Impressions Embossing Folder.

Loving this color!  The Brick Wall Embossing Folder provides a pretty background for the hand colored holly and berries.  Gold Glitter Ribbon peeks out from behind the Peace sentiment, also from the Peaceful Wreath stamp set.  The edges of the Very Vanilla Paper are sponged with the same pretty Hello Honey Stampin' Ink.

Sunday, December 20, 2015

Your Presents

A quick and easy card that uses the Your Presents stamp set, but would be just as easy to make on your own with DSP or even solid color cardstock and some ribbon or Gold Cording.  The Brick Wall Embossing Folder provides a cute background and the Jolly framelit comes from the Christmas Greetings Thinlits collection.  Fun and quick!

Another simple card created with the Your Presents stamp set and the Red Striped ribbon, along with the Gold Cording.  A strip of Gold Foil adds elegance.  The sentiment is stamped in Gold ink and the Real Red cardstock is punched out with the Scallop Oval punch, one of my favorite punches.

Here's a way to use the same stamp set for a Thank You or Birthday card.  The gift bag uses a Doily and Gold Cording and the background is embossed with the Large Polka Dot Embossing Folder.  The sentiment is stamped in Whisper White Craft Ink (give it a few hours to dry!) and hand cut.

I hope you're having fun this weekend preparing for Christmas festivities next week.  We made gingerbread houses this afternoon!  So fun.

Saturday, December 19, 2015

Embellished Ornaments

Such a gorgeous set of Thinlit Dies! This Delicate Ornament Thinlit Die set comes bundled with the Embellished Ornaments stamp set.  The Silver Cording, Red and Silver Foil Sheets and Rhinestones colored with Real Red Stampin' Markers just give this card a special look.  Red Striped Ribbon and a strip of Holidays Fancy Foil Designer Vellum finish off this beautiful card.

This simple card achieves an elegant look with the Delicate Ornament Thinlit Die and the versatile Brick Wall Embossing Folder.  Real Red Foil is punched out for an ornament hook and a rhinestone adds a touch of bling.  The DSP is from that pretty watercolor look set called Season of Cheer.

Another simple to make card using the same sets.  This one also adds White Glitter Ribbon and rhinestones (some colored with Stampin' Markers) and the 'peace' sentiment from the Christmas Greetings Thinlits Dies.

Merry Christmas!

Friday, December 18, 2015

Joyful Season!

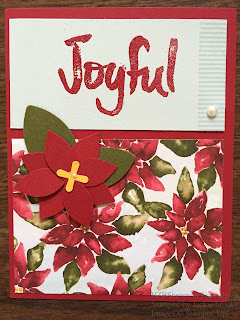
I really love this new DSP, Season of Cheer.  It has a pretty watercolor feel to it, which goes with this stamp set, Joyful Season.  This card also has a 3-D poinsettia flower, punched out using the Festive Flower Builder Punch.  A tiny piece of Season of Cheer Washi Tape and a Pearl add some extra fun.  The Joyful sentiment is embossed with Cherry Cobbler Embossing Powder.

This pretty bird uses two-step stamping.  The outline is stamped first, then the color is added later.  Washi Tape and Gold Glitter ribbon blings it up, along with the Peace sentiment, which is punched out from a Gold Foil Sheet using the Christmas Greetings Thinlits Dies.  The ribbons are Basic Black Stitched Satin Ribbon and thin Gold Metallic Thread.

This one is my favorite from this set.  I just love the pretty yellow flowers.  This card uses the Reason for the Season stamp set, some pretty Daffodil Delight 1/4" Cotton Ribbon and a tag made from White Vellum Cardstock.  The sentiment is framed with the Scallop Circle and Circle punches.

Well, we are 7 days away from Christmas already, so if you are behind on your cards, use this last one to make Happy New Year cards.  I hope you're all enjoying the holiday season.  My kids are making Christmas cookies today.  Yum!  

Wednesday, November 18, 2015

Thankful for Lighthearted Leaves!

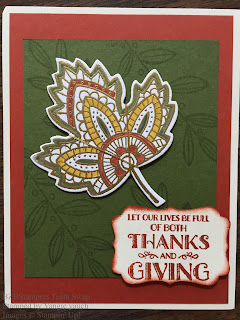
Here is a gorgeous Stamp Setthat really comes alive when you use the Gold Embossing Powder with it.  The colors are added with Stampin' Markers.  The leaves in the background are stamped using Versamark Ink.  A tiny piece of Gold Metallic Thread makes the leaf sparkle.  So pretty!

This friendly card uses one of the leaves from the same Stamp Set (Lighthearted Leaves) to created a modern, geometric pattern.  The "Hello" is from the Greetings Thinlits set, punched out of Gold Glimmer paper, using the Big Shot.  A few dabs of glue with some Gold Glitter add a bit of extra bling.

This last card showcases some of the pretty Into the Woods Designer Series Paper.  A few Rhinestones and some Gold Cording finish it off.  This card would make a nice masculine birthday card, too!

I have one more set of Thanksgiving cards to share and then I will start sharing some beautiful Christmas cards!

Friday, August 9, 2013

My first Video! Stampin' Up Haul from the new Holiday Catalog!

Here it is!  My very first youtube video!


I'm so excited...I finally got the link to work!  I hope you enjoy all of my new goodies.  :)

Halloween Circle Thinlit Card

Here is my first card I made with my new Circle Thinlit Die!  It was so quick, I was amazed.
I used the new Witches Brew DSP, with Pumpkin Pie cardstock.  I stamped with Black Stazon, which gave me a crisp look, then sponged the edges of the scallop punched piece with pumpkin pie.  The little strip of DSP on the edge was cut with the Adorning Accents Edgelits.

Here is the inside.
The stamp set I used is the new Best of Halloween set that just came out for August.  Lots of fun stamps in that one.

To purchase, please click on my Online Store at the top of my blog.  Enjoy!

Friday, August 2, 2013

Stampin' Up! Thinlits Card Dies


I just love these!  Click on the link to the flyer in my previous post for more information or just click on the button at the top of my blog to go to my Online Store to purchase.  I can't wait until mine arrive!

Love Pop-Up Cards? Stampin' Up has a Brand New Die!

Check out the new Thinlets Card Dies!

These are so cool!  I just ordered mine and I can't wait until they arrive.  We saw them demonstrated at Convention and it's amazing how easy they are to use.


Here is a flyer with more information.  To order, click on the Store button at the top of my Blog.  Enjoy!